I've recently tried this cute nail polish from Yubiso. They've got a great selection of colours and I just couldn't resist. So I bought one home just for a test drive. After all, it was cheaper than Opi or Sally Hansen.
So I got Colour 46. It's a very nice nude rose hue. It was super easy to apply and zero streaking. It dries super fast so that's an extra bonus.
After about a week wearing it with minor touch ups, I've only just discovered it by chance. While showering, I've noticed the nail polish on my index finger has peeled off partially like a dog's ear on the page of a book. So I just pulled it off and it came off easily intact like a sticker. I then tried it on my other nails and they all came out with ease.
I was ecstatic because I really detest removing nail polish with removers because they wear out my nail and leave them rough. This was perfect for me. It was quick and easy removal in the shower with no mess as it peels off whole. Plus another bonus, the nail polish do not stain your nails yellow.
This nail polish is perfect! Try it out for yourself. It definitely saves time and not forgetting my nails too!
Showing posts with label Beauty Tips. Show all posts
Saturday, March 25, 2017
The Best Concealer - Artdeco Perfect Teint Concealer - No. 6
The best concealer that even Lucy Liu approves!
For me, I think concealers are the trickiest part of makeup application. Most times, I would find a concealer that is blendable but the color is just not right. The rule of the thumb is, if you can see your concealer, it's not the right color. The concealer has to blend into your skin completely. Now, that's what I call a perfect concealer.
I was looking high and low for the perfect concealer. I've tried The Body Shop's concealer, it's rather not bad, not much complaints except it still leaves me the need to search for the perfect concealer. Then I've switched to MAC's concealer and it left me with a bad impression. Ok, to be fair to MAC, it may be a good concealer(in fact it was easily blendable and provided a good coverage in concealing my flaws) but I've used it at the wrong time. I was having a major breakout of my life!! The texture was creamy and maybe alittle too oily for my sensitive and blemished skin. My breakouts rebelled and became more out of control! (I'm sorry MAC, but I love your products but I do not have the courage to try out your concealer ever again.) I would like to hear more feedback from you guys who swear by MAC.
So, back to my hunt for the illusive concealer. My answer came in the form of sexy Lucy Liu. You see, Lucy Liu always looks perfect and porcelain in her makeup. She looks flawless in every picture yet her makeup looks natural like she didn't even try. Ok, I agree, so she accentuates her eyes alot, but her skin always looks healthy and naturally beautiful. That is an undeniable fact. So, I was reading a feature in the magazine of what's in Lucy Liu's makeup bag. She has her eye liner, mascara and her all-time must-have: concealer. I've also been reading some makeup tips and the concealer seems to be a choice for many celebrities too. So, I gave it a go and bought myself one.
My answer for the perfect concealer came in the form of Artdeco Perfect Teint Concealer - No.6
It works like a charm!! Arguably it has to be the best concealer in the market. This twist-pen liquid concealer has a light, smooth texture that glides over my skin and offers substantial, but imperceptible coverage. The soft matte finish poses little risk of creasing and creasing is what I hate most when other concealers start to settle into the fine lines around the eye area at the end of the day. This, my dear, works like a dream. The color is so natural and works best for fair to medium toned skin. Of course, its quite similar to YSL's Touché Eclat Highlighter, but I assure you, it really really does deliver and it beats having to try and try every other concealer in the quest for the perfect one. Best part is, it's price is half of YSL's.
I'm the biggest fuss pot when it comes to finding the most blendable and natural makeup look (my mantra), but Artdeco Perfect Teint Concealer - No. 6 gets a two thumbs up from moi!
#budgetbeautymommy
#budgetbeautymommy
Best Essential Oil for Restful Sleep - Every Night!
Beauty sleep is sooooooo important. Sleep is such a rare commodity especially if you have a family and little darlings.
I've always been a light sleeper and I can literally wake up to a pin drop. I'm also the most grumpy person imaginable if I don't have enough sleep. So, you can imagine how deliriously happy I am when I found Balance. It's a super grounding blend too.
I sleep through the night and even if I am awoken I sleep off immediately.
Even big daddy requests for it before he sleeps -every night!
It works like a charm and I wake up to blissful sleep. Lavender Peace also gives me good restful sleep but I find it works better on little darling.
Share with me how do you get restful sleep every night?
Find out more about Balance here.
#budgetbeautymommy
Find out more about Balance here.
#budgetbeautymommy
Natural Remedies for Dark Eye Circles
Well, you see, most budget beauty mommies are afraid to get the much dreaded dark eye circles. They are not attractive at all and makes one age a few years extra. I know I'm not the only one with this problem, so I have compiled a list of home remedies that you can try out at home.
First, we separate them to three categories, the first category is to conceal them effectively, the second category is to get rid of them permanently and the third category is home remedies easy enough for everyone to do. It takes time but worth the effort when you see a new pair of beautiful fresher eyes.
To Camouflage dark eye circles
The product you should opt for should contain ingredients like Mica and Bismuth Oxychloride. These ingredients will help to reflect light and thus reduce the look of dark appearance under the skin. Also, the ingredients are very light and they do not appear to look too heavy or cake under your eyes, which make them even more obvious.
Also, look for creams with Vitamin K, Collagen, Elastin and hyaluronic acid to plump up eyes to prevent that dull sunken in under eye skin, which enhances the darkened skin underneath the eyes.
Normally, before you apply this makeup as camouflage, apply some light anti dark eye circle cream to protect the skin under the eyes and to plump up fine lines, then lightly press the powder over the under eye area. The key here is not to drag the brush across the under eye area, but to press the powder onto the skin. This will help to minimise the powder from setting into the fine lines, and thus, making them more obvious.
To get rid of dark eye circles for real
1) Get enough rest - It's true, sleep deprivation will cause the skin under the eyes to darken, looking like a panda, but just not as cute. Besides, take power naps about 10-15 minutes of shut eye will do you lots of good in blood circulation
2) Stress kills - Stress is a killer and a major beauty destroyer. Try to unwind and keep your mind free. Exercising will be a good form of relief and it also helps to improve your blood circulation. If not, try to listen to music, it helps to release stress. Or go out have a nice meal with your family. Don't stress on cooking. Try it today.
3) Get plenty of nutrition - Nutrition helps to pump rich blood all over your body. With a better circulation, it will help to rid off dark eye circles. Get better nutrition by having a balanced diet, diet full of fruits and veggies, grains, nuts and legumes. Treat your diet like a rainbow, try to eat foods with very strong colors like reds, yellows and orange. They are mostly rich with anti-oxidant properties. I suggest to get extra supplement like vitamin B complex and Vitamin C to complement your diet.
4) Drink lots of Water- At least 6-8 glasses of water a day to drain out toxins from the body and to help in circulation. The liver and kidneys sometimes are overworked with too much toxins in the body, thus appearing in the form of bad skin or dark eye circles. Drinking water will help them to flush out the toxins from the body. Drinking water will also hydrate your skin and help to sooth out fine lines from forming -minimizing more dark eye circles.
5) Massage - Massage your eye areas gently to increase blood circulation. Most times, blood circulation is very poor underneath the eyes, especially more so when you have a poor diet. Lightly tap all the areas under the eye with your third finger, as it doesnt exert too much pressure as your index finger
6) Get a good eye cream - Get a good rich eye cream for night use and a lighter eye gel for day time use. Find for ingredients like alpha hydroxy acid in the creams.
Home Remedies
1) Tea fix - Brew some mint tea or green tea then let the teabags cool. Then, place them over the eyes for about 10 minutes or alittle more as you wish
2) Sourcream's the way to go - Mix two teaspoons of sourcream and 1 teaspoon of chopped parsley. Put the mixture into a straining cloth and apply to eyes for about 10 minutes or more
3) Cool as Cucumber - Cut out two thin slices of chilled cucumbers and place on your eyes. You can place the cucumbers on your eyes for 10 -15 mins or as long as you like till the cucumber turns warm from your heat
4) Strawberries - But with no cream. Slice the chilled strawberries, about 2 strawberries, or more depending on your needs. Then place them on your eyes and becareful not to let them get into your eyes or it will sting. Strawberries are good because they are high in alpha hydroxy acid, which is highly appreciated in most anti wrinkle creams
5) Milk soother - Grab a bowl and pour some chilled milk in them and throw in a few cotton balls to soak up the milk. Then relax and lie down while u place the cotton balls over your eyes. You will feel the skin is smoother and more relaxed and aids in circulation and lessen the dark discoloration under the eyes
6) Potatoes - Cut two slices of potatoes with skin, raw and just simply place them over your eyes like how you will with cucumbers. The enzymes in potatoes help to reduce the dark circles under eyes
I hope I have helped in this post. Please share with me if you have any other remedies.
#budgetbeautymommy
Monday, February 13, 2017
Best Skincare Regiment for Acne - Doterra HD Clear Kit
Hi guys, it's Valentine's Day soon and I'm in love.
Yup, I've been using this kit since December and I want to really try it before giving my verdict. The more I use it the more I love it. It's so effective.
Doterra HD Clear kit
It comes with a HD Clear Foaming Face Wash, HD Clear Topical Blend which is a rollerball spot treatment and HD Clear Facial Lotion.
With just a 3-Step Regiment twice a day, any acne even stubborn hormonal cystic acne is treated. For me, I saw results in less than a week! Existing acne heals at a much faster rate therefore scarring is minimal. It's amazing, truly amazing.
I can vouch that this kit has cleared my skin literally over night. Very rarely do I get a blemish or two. I don't panic now as new acne heals so quickly it's barely noticeable. It also very effectively prevents new acne from forming.
So, this Valentine's Day, if you are not sure what to get your sweetheart, this HD Clear Kit is bound to be a hit.
Tuesday, November 15, 2016
Best Snail Extract Gel Mask: Celebrity Snail Extract Moisturizing Gel Mask
My very recent skincare routine includes face masks and snails. I've finally succumbed to the snail trend, which honestly is so yesterday, but I have to say it's really one of the most amazing skincare discovery since Retinol.
Recently, I've been totally addicted to face masks especially the Korean made ones. Being a budget beauty mommy, my criteria for a good face mask is convenience and effectiveness.
My current top choice is Celebrity Snail Extract Moisturising Gel Mask.
This mask is so amazing in so many ways. First of all, the snail extract is in the top 3 ingredients list so it has a high content of the goodness. It comes in a gel mask so it is so comfortable and it hugs the face snugly and doesn't dry up like normal sheet ones. You can even sleep through the night with it without it drying and hardening on your face. Korean masks also has the perk of being smaller sized than other masks so they don't mess up your hairline. In short, putting the mask on is not such a hideous affair.
Now, the results of this mask is just so wonderful. It helps repair and lighten hyperpigmentation such as acne scars very rapidly. You can see results almost immediately, the scars are lightened in just one application Also it leaves my skin super supple and moisturised. It does live up to its claims and I'm sold! I'm currently on my third box.
If you want immediate results, do use the mask everyday. It can be quite pricey and time consuming to put it on everyday. So you can actually use the remainder of the essence in the packet the next day and use the mask on alternate days. The results are just as good and it helps without taxing your purse too much.
Budget beauty mommies, you have to give this a try and see for yourself. Let me know if you love it or not. Can't wait to hear your verdict.
Tuesday, October 11, 2016
Acne Cure with Strawberries
Guess what season is it now? It's strawberry season everybody. I love strawberries and all budget beauty mommies out there, that means you, should know that strawberries or any berries are very very essential to your beauty. I love everything about strawberries and any beauty products with strawberry. Yes, I'm absolutely, utterly crazily mad about strawberries!!
So, what's so spectacular about strawberries?
Strawberries can be used for conditioning and toning the skin. They are rich in salicylic acid an ingredient found in many commercial acne creams and thus are the best treatment for acne-prone skin.
How to use strawberries?
Mix 1/2-cup fresh strawberries with a tablespoon of yogurt for a weekly facial mask. If you're enjoying some strawberries, just simply cut the strawberry into half and rub it all over your face gently. Your skin feels rejuvenated and toned after that. It even helps with cystic acne.
Other strawberry goodness - Eating fresh strawberries will also help whiten your teeth and keep your breath fresh. Just rub the strawberry over your teeth and your teeth will be visibly whiter after that. Trust me, give it a try! Plus, strawberries just taste so good and smell heavenly.
Wednesday, September 21, 2016
10 foods you eat to prevent acne
As promised, here are yummy foods to cure acne from the inside. Didn't I tell you, curing acne could be fun and indulgent too?
Here is a list of foods to beat acne at its own game:
1) Organic Green Tea - Green tea is rich in an anti-inflammatory chemical called catechins, which helps to combat free radicals and prevent fine lines.
2) Olive Oil good mono-unsaturated fats like olive or sesame oil contain essential fatty acids that are needed for good health. Fats are an integral part of cell membranes and will help to nourish the skin and give it an inner glow.
3) Walnuts - They are rich in omega-3 oils, another powerful antioxidant that helps to keep the skin plump and flexible. Omega-3 oils are also found in oily fish such as salmon, or in flaxseed oil.
4) Berries Blueberries, raspberries, cranberries are all rich in phytochemicals that are protective of skin cells. You can't get the same results though, from frozen or preserved fruit.
5) Lemon Juice - It's a natural bleach and can be used to fade sunspots and freckles. Put a slice of lemon over the spot and leave it for 10 minutes everyday for a week, or exfoliate by rubbing a cut lemon and half a teaspoon of granulated sugar over the skin for a few minutes. Be careful not to get any lemon in your eyes and stop immediately if you get a bad reaction as some people have extremely sensitive skin.
6) Watermelon Some people believe that rubbing their faces with the rind of a watermelon will give them beautiful skin.There is plenty of truth to this, as the pulp of the fruit is a good exfoliant and watermelon is rich in vitamins A, B and C. The fruit contains a lot of water which serves to hydrate the skin and the gentle massaging action will stimulate lymphatic drainage.
7) Low-Fat Dairy Products - One the most important components of skin health is vitamin A. One of the best places to get it is low-fat dairy products. In fact, experts say that the health of our skin cells is dependent on dietary vitamin A.
8) Whole-Wheat Bread, Eggs and Brazil Nuts - Dietary Selenium comes from nuts, cereals, meat, fish, and eggs. Brazil nuts are the richest ordinary dietary source. The mineral selenium connects all these foods for healthy skin. Experts say selenium plays a key role in the health of skin cells. Some studies show that even skin damaged by the sun may suffer fewer consequences if selenium levels are high.
9) Yogurt - Yogurt is a very important natural beauty aid. Apply yogurt on the face every morning as a quick nourishing facial mask. Wash it off after a few minutes with cold water. This will keep the complexion smooth, healthy and fresh. A mixture of yogurt and lemon juice is ideal for softening hands.
10) Apples - Apples contain lots of pectin and it's the enemy of the acne. Rejoice!! Remember to eat the skin too as pectin is mostly concentrated there. If you eat without the skin, it would not be as effective. Eat the skin as dietary fibre too
Monday, August 15, 2016
Most long wearing lip ink from Nakeup Face Korea
Just received my Nakeup Face One Day Water Volume Lip Ink(No.4 Look at Me) from Korea.
The moisture level and lasting power of the lip tint is amazing but the colour is way too red for my style. This lip tint is really, really very long lasting and richly pigmented. I ate and drank my meals with it and it still stayed on. It's amazing.
If you blot your lip after application, it minimises transfer on cups and on your lil darling's cheeks.
I found the colour to be too red so I opted for a gradient lip look.
Thursday, July 14, 2016
Full review of all drugstore acne patches
Are acne patches the answer to keeping zits at bay. Am plagued by the zits. Thanks but no thanks.
So, I've been testing out every single drugstore acne patch in the market. Seriously, they are God sent and I'll make life easy and breakdown which 3 brands are yays and which are nays.
1. Nexcare Acne Patch
Pros:
1. Works well in sucking pus out of the zits
2. Good in drawing a head for cystic acne
3. Many patches in various sizes. 30 in the biggest pack. Good deal for money.
Cons:
1. too thick and shiny surface. Can spot it from a mile.
2. If you have an old pack, the patch seems too sticky on both sides. Yikes.
Tip: best to use during bedtime.
2. Oxy Antibacterial Acne Patch
Pros:
1. Works like a charm in getting pus out. The best of the three.
2. Has 26 patches in various sizes.
3. Great in bringing cystic acne to a head
4. Easy to peel off the packet
Cons:
1. Still too thick for my liking and too shiny. Very noticeable.
3. Miacare Acne Patch for Day, Night, Day and Night.
Pros:
1. the best acne patch in terms of how invisible and thin it is. You can hardly tell its there. I actually forget I have it on my face.
2. Ok in getting pus out. The Day formula seems to work better than Night version.
Cons:
1. Quite hard to peel it off from the packet. If it's rippled, it loses its opaqueness which makes it unnoticeable.
2. Very few patches in a pack. Only 12.
Tip: use it for day as it keeps your itchy fingers from touching your zit, exacerbating it's inflammation.
So, there you go! Hope it works for you too.
Wednesday, July 13, 2016
Best shampoo and conditioner to use everyday
Hair is my crowning glory. I'm like Samson, my power comes from my hair. Just kidding, I'm just so used to having long hair most of my life and I can't imagine without it. (or just dead boring lol)
Long hair requires a good shampoo and more so a conditioner. Partly because I've not done hair treatment for years and years. *gasp* Plus, my hair is heavily coloured yet it's not frizzy nor dry. I've tried many brands out there from drugstore to luxe brands and I'm absolutely in love with this mid range salon shampoo and conditioner.
It's Bain de Terre Meadow Green Balancing Shampoo and it's Conditioner.
Why I love it?
1. It's very gentle and perfect for everyday use
2. Not heavy so fine hair is not weighed down. I even apply it to my roots and no problems!
3. Price is mid range so it's affordable
4. Has no parabens so this budget beauty mommy is ridiculously happy
5. Infused with Argan oil and Monoi oil. You know I'm a big fan of essential oils
6. Fresh and crisp scent without a heavy synthetic aroma
Seriously, what's not to love? I like to get mine in the 1L Bottle as I hate running out of it.
Thursday, June 30, 2016
Foods for whiter teeth
We've been told to avoid red wine, black tea or coffee to get pearly whites. What if I told you, you can get whiter teeth just by eating the right foods? Try these natural foods for a megawatt smile.
1. Strawberries
Strawberries contain malic acid that acts as an astringent to remove surface tooth discoloration. Catherine Zeta Jones is known to whiten her teeth with strawberries.
2. Raw carrot and celery
These skinny cruciferous vegetables increases saliva production which effectively cleans food debris from teeth. They make great snacks too while shrinking your waistline.
3. Apples and pears
Apples and pears' crunchiness helps strengthen gums and it's high water content increases saliva production too. It also helps to disperse colonies of bad bacteria that induces bad breath and plaque on teeth.
4. Baking soda
Try brushing your teeth with baking soda. It's slightly abrasive and helps scrub off plaque and surface stains. Rinse with salt water to keep bad bacteria in the mouth at bay.
5. Water
Water helps dislodge food stuck in the teeth. It's good to swish your mouth with water after eating dark colored foods to reduce staining. Water also helps reduces acidity in the mouth which erodes teeth enamel which makes teeth weak.
Monday, June 20, 2016
Soap Stories Natural Shine Nail Kit Review
This is especially for budget beauty mommies who want manicured nails without having the time to maintain their nails.
This is the Natural Shine Nail Kit. It's amazing. It's so easy to use and the results are fantastic. It was s very thoughtful present by my Darling.
It comes in a beautiful zippered pouch with 4 items in it. There's the amazing 4-step natural shine nail buffer, oatmeal exfoliating soap, cuticle oil and hand & nail enriching cream. It's an entire hand and nails care set. Very impressive and smells great. Texture is light and non greasy.
Method of using:
1. Wash my hands with the oatmeal exfoliating soap
2. Start buffing with the Natural Shine Nail Buffer. Just follow the steps on the buffer.
(A) The Shape Strip: the nail file to smooth away rough edges and to create desired shape.
(B) The Smooth Strip: to remove all remaining ridges on nails. Buff it for about 2-3 seconds per nail.
(C) The Buff Strip: buff each nail for about 2-3 seconds to stimulate circulation
(D) The Shine Buff: buff for a really glossy finish. Buff each nail for 5-10 seconds or as long as you want till they are really shiny
3. Next, apply cuticle oil to seal in your cuticles and as a polish base
4. Moisturise with the hand and nail enriching cream. Smells really beautiful.
Bonus: the buffer has a lifetime guarantee, so anytime it has stopped working for you, just drop by to the nearest shop and exchange for a new one :)
Look how shiny my nails are and they last for weeks. When it starts fading, just top up with the buffer for more shine.
Wednesday, June 8, 2016
Best Homemade Toner
Apple cider vinegar(ACV) is one of the best toners for your skin. It's astringent but it doesn't dry out your skin at all. It's amazing and so easy to prepare. It's great for combatting acne too. I've started using it about three weeks back and loving it. Definitely tames the shine on my face.
To prepare:
1. Get a small and very clean glass bottle.
2. Add one part ACV and equal part water.
3. Shake and mix and store in the bottle.
4. It lasts for weeks when stored in dry and cool place.
To use: Dab some ACV toner on cotton pad and tone your skin upwards. Use twice a day.
Point to note: ACV has a strong aroma and may take some getting use to. Don't worry, after about 30 minutes, nobody can smell it on you at all, even with the sharpest scent hunter. So, don't worry about the smell. If the smell bothers you, you can add some rose water or lavender essential oil to even out the smell. Honestly, I prefer my toner to be really simple and fuss free with the best bang for the buck.
To get the best benefit of your ACV toner, only use unpasteurized, unfiltered and organic ACV, with the 'mother'. That's where all the goodness are.
#budgetbeautymommy
![]() |
| My homemade ACV toner |
![]() |
| Instructions for your DIY ACV toner |
Monday, June 6, 2016
Instant Glam with Step-by-step Falsies Guide
The one thing that can instantly glam you up is fake eyelashes or we call it falsies. They really look glamorous and so easy to put on. With falsies, you don't need mascara or even eyeliner. Only one step to instant glam. Saves you tons of time in the mornings so you can spend more time with your little darlings.
1. Buy a pair of falsies that you really like. I prefer mine slightly more dramatic so I like them slightly longer lash at the ends.
2. I don't trim my falsies because they tend to run or go out of shape easily. Also, I like the dramatic look so longer lashes the better! If you have to trim it, just snip the front ends of the falsies where they go at the inner corner of your eyes.
3. Use eyelash glue that has a wand applicator so you can control the amount of glue on your falsies. Choose black colored glue as they blend better with your natural lashline. White or transparent glue dries and they turn yellowish on your lashes. Not slightly at all!
4. Apply glue to the adhesive strip on your lashes but don't put too much glue. Wipe off excessive glue with a baby wipe. Don't use tissue as it might leave tissue bits on your falsies.
5. Place your falsies right above your lashline but as close as possible to it for a natural look. Don't stick it on your lashline as it may yank your natural lashes off when removing it.
6. Hold it in place for few seconds and voila you have glamorous peepers. Repeat on the other eye, of course.
7. To remove falsies, just pull it gently off from the inner corner of your eyes outwards. You can wipe your falsies with baby wipes to remove leftover glue. Place it back in its case to maintain its shape.
Try it, you'll love it for sure.
#budgetbeautymommy
Monday, May 23, 2016
Hair hacks for busy mom morning routine
Mornings can be such a rush and the last thing you have time is your hair, unfortunately. But, NO budget beauty mommy should look frumpy just because we are short on time. Here are some quick hair hacks that I follow to look well coiffed with the least time spent.
1. Tie your hair into a high bun and sleep with it. You'll wake up to lovely curls in the morning. Instant glamour to your bed head look.
2. During your morning shower, stay off shampoo and go straight for the conditioner. It makes hair really manageable and you can even get away with just towel drying. Say hello to very soft manageable hair.
3. If you're planning to tie your hair up the whole day and want to make it stay up, don't wash your hair in the morning. Your up do stays better that way. Bonus: don't need to use any hairspray.
4. Accessorize your updos with cutesy hair clips instead of boring bobby pins. Don't have to look matronly with an updo, budget beauty mommies can have some fun too.
5. Top hairstyles that stay up without having to touch up are French braids, French twist and high pony tails.
Tip: the best part of putting your hair in an updo the whole day is it creates gorgeous waves when you let it down in the evenings for an impromptu outing.
#budgetbeautymommy
#budgetbeautymommy
![]() |
| French braids are perfect for super long hair |
![]() |
| Washed with conditioner only and towel dried |
![]() |
| My version of the french twist with cutesy clips and pins |
Tuesday, May 17, 2016
3 Surprisingly Easy Methods to Get White Fingernails
I really get annoyed when my fingernails turn yellow especially after prolong use of a darker shade nail polish. I have found three surprisingly easy and convenient ways to get whiter nails.
1. Soak your nails in lemon juice for about 3-5 minutes and if needed scrub them with a baby toothbrush. Have you ever realized how white your nails are after you have squeezed fresh lemons or just by cutting and holding lemons? Say Yay to the whitening power of lemons! Oh, don't forget to moisturize your fingernails and hands with my Horse Fat Hand Cream.
2. Simply apply a base coat on your nails before applying your colored nail polish, so the color will not transfer to your nails.
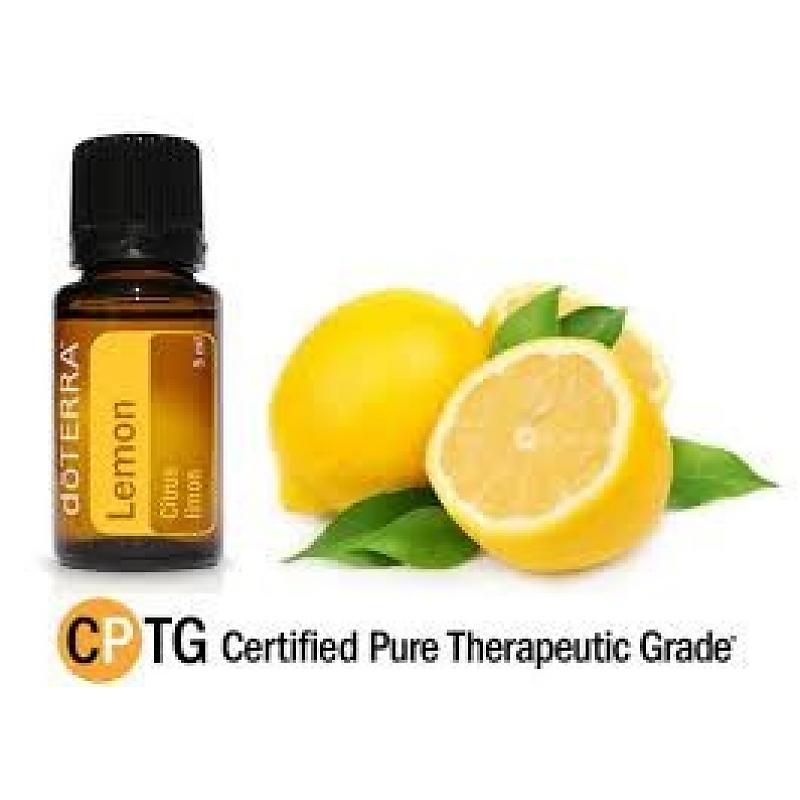
3. Dab some Doterra lemon oil to your nails and scrub with a baby toothbrush. Beauty of this essential oil is, it's 100% natural and 100% pure lemon oil with no synthetics. Plus, you don't need to moisturize your fingernails after, as it's not drying like lemon juice.
Bonus: These 3 methods are so effortlessly convenient and easy and you get nice white nails. Nothing says polished like clean, white fingernails.
Check more out on Budget Beauty Mommy!
#budgetbeautymommy
![]() |
| The ever trustworthy Doterra Lemon Oil. Each drop is equivalent to 23 cups of lemon tea. |
![]() |
| Soak your fingernails for nice white nails |
Monday, May 9, 2016
Recipe for Homemade Cinnamon Face Mask for Acne Prone Skin
This is probably one of the most effective and simple treatment DIY
mask you can do at home - Cinnamon Face Mask. This mask is great for
problematic blemished skin. This makes a good cleansing mask once a week
just to keep your skin cleansed thoroughly.
Ingredients:
1tsp cinnamon powder
1tsp baking soda (to thicken the mask up)
1 tbsp honey
Mix well and leave on for 15 minutes. You may feel slight burning due to the cinnamon but it goes away quickly. If you have very sensitive skin, add more honey.
Wash face after mask with warm water.
Try the mask 3 times a week.
Budget beauty mommy loves this because it's 100% natural, its effective on acne flare ups and it's cheap and cheerful and you probably already have the ingredients in your kitchen conveniently.
Bonus: the mask smells and tastes great like a pie. Yeah, sometimes I just can't help tasting it 😉
You can also try my Moisturizing Coconut Oil and Baking Soda Face Mask.
Check for more at Budget Beauty Mommy!
Ingredients:
1tsp cinnamon powder
1tsp baking soda (to thicken the mask up)
1 tbsp honey
Mix well and leave on for 15 minutes. You may feel slight burning due to the cinnamon but it goes away quickly. If you have very sensitive skin, add more honey.
Wash face after mask with warm water.
Try the mask 3 times a week.
Budget beauty mommy loves this because it's 100% natural, its effective on acne flare ups and it's cheap and cheerful and you probably already have the ingredients in your kitchen conveniently.
Bonus: the mask smells and tastes great like a pie. Yeah, sometimes I just can't help tasting it 😉
You can also try my Moisturizing Coconut Oil and Baking Soda Face Mask.
Check for more at Budget Beauty Mommy!
![]() |
| Best homemade cinnamon face mask for blemished skin |
Best Drugstore Shampoo and Conditiner
I seem to be having problems with shampoos and conditioners. They
seem to work for awhile then they just stop working its magic. It's a
constant tedious search for the right ones for me, with very fine hair.
My current love is Watson's Arome Fresh Bouncy. It's not too heavy and gives volume to my hair. Smells subtle but refreshing.
Bonus: it's paraben and sulfates free. It's also enriched with four natural oils. The less chemicals the more I love. Think it's important that pregnant mommies and nursing mommies have as little contact with chemicals as possible. It also comes in a generous 550ml very pretty bottle which lasts for months.
Check more out on Budget Beauty Mommy!
![]() |
| Arome Fresh Bouncy |
How to Do Oil Pulling Correctly
Just tried oil pulling today. It's a traditional Ayurvedic way to
pull toxins out of your body. It's relatively simple and affordable to
try.
Method:
Just take 1 tablespoon of coconut oil and gargle for 15-20 mins. Expel out all the oil at the end. Brush your teeth immediately to get all the toxins out. Do this for two weeks for it to be effective.
It should be done first thing in the morning on an empty stomach. Sounds easy right? But do remember, the oil grows bigger as you keep it longer in your mouth, so it's quite a mouthful at the end.
Some tips from my experience:
1. Don't gargle vigorously as it's very tiring and 15 mins feels like an eternity.
2. Oil pull when you're preparing breakfast for family so time passes quickly and you won't be too conscious about it. I usually like to wake up slightly earlier while I get everything ready before family wakes up.
3. Expel your coconut oil entirely and don't swallow it as you're ingesting your toxins again. Defeats the whole purpose of oil pulling.
4. Expel into the toilet instead because it may clog up your sink.
Extra bonus:
5. Your family may be very happy as you can't nag them with your mouth full of oil for 15-20 mins 😉
Purpose of oil pulling:
1. Healthier gums and teeth.
2. Eliminates bad breath
3. Reduces toxins in our body
4. Helps to improve skin problems
5. Reduces aches in the body due to toxin accumulation
Check more out on Budget Beauty Mommy!
Method:
Just take 1 tablespoon of coconut oil and gargle for 15-20 mins. Expel out all the oil at the end. Brush your teeth immediately to get all the toxins out. Do this for two weeks for it to be effective.
It should be done first thing in the morning on an empty stomach. Sounds easy right? But do remember, the oil grows bigger as you keep it longer in your mouth, so it's quite a mouthful at the end.
Some tips from my experience:
1. Don't gargle vigorously as it's very tiring and 15 mins feels like an eternity.
2. Oil pull when you're preparing breakfast for family so time passes quickly and you won't be too conscious about it. I usually like to wake up slightly earlier while I get everything ready before family wakes up.
3. Expel your coconut oil entirely and don't swallow it as you're ingesting your toxins again. Defeats the whole purpose of oil pulling.
4. Expel into the toilet instead because it may clog up your sink.
Extra bonus:
5. Your family may be very happy as you can't nag them with your mouth full of oil for 15-20 mins 😉
1. Healthier gums and teeth.
2. Eliminates bad breath
3. Reduces toxins in our body
4. Helps to improve skin problems
5. Reduces aches in the body due to toxin accumulation
Check more out on Budget Beauty Mommy!
![]() |
| Use extra virgin organic coconut oil |
Subscribe to:
Posts (Atom)


